
Thick or stiff webbing can make a silicone logo feel like a risky choice, especially when the finished strap will bend or move repeatedly. But changing the webbing just to protect the logo may mean compromising a requirement your product actually needs.
No. Silicone logos do not fail simply because the webbing is thick or stiff. They can work well when the silicone bonds properly to the webbing surface and can tolerate the bending or deformation that the printed area experiences in the finished product.
Read on to see what actually increases failure risk, how logo design, placement, and printing affect durability, and what you should test before approving silicone printing for your webbin

Webbing manufacturing expert with 15+ years of experience helping product developers build high-performance straps for industrial, medical, and outdoor use.
No. Thick or stiff webbing does not by itself make your silicone logo more likely to fail. The risk depends more on whether the silicone bonds properly and what happens to the printed area when your finished strap is actually used.
Your webbing may feel thick and rigid in hand but stay almost flat where the silicone logo sits after assembly. In that case, stiffness alone gives you little reason to reject silicone. But if the logo crosses a section that repeatedly bends around an adjuster or another component, the same webbing creates a different requirement: the silicone must remain bonded while moving with that area. Silicone textile inks can have high elongation, so simply comparing “stiff webbing” with “flexible silicone” does not tell you whether the logo will last.
The manufacturing insight is to judge the movement at the logo location, not how stiff the whole webbing feels in your hand. Two areas of the same strap can put very different demands on the same silicone logo.
If your logo area stays relatively flat in use, ask your supplier to test the original logo on your required webbing first. If that area repeatedly bends, test the sample at that same bend rather than only checking a flat piece of webbing. If the result is poor, you can then evaluate the logo design, placement, or printing process before changing a webbing construction your product actually needs.
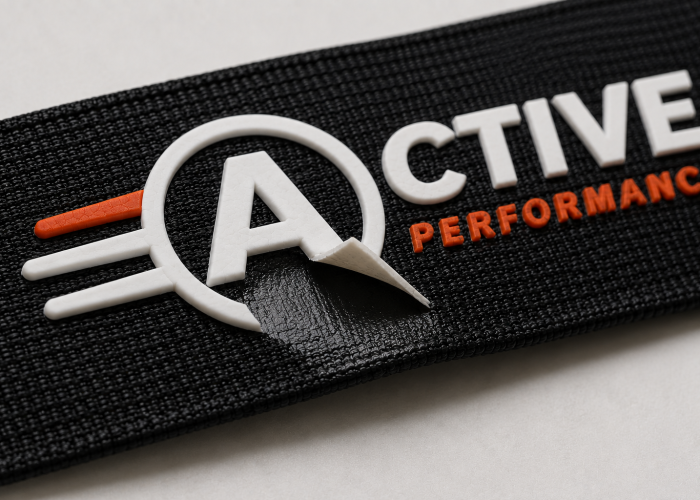
Webbing surface affects silicone logo adhesion because the silicone must bond to the finished surface of your webbing—not simply to “polyester” or “nylon” as a material name. Two webbings made from the same fibre can therefore require different adhesion evaluation when their finished surfaces are different.
If your silicone logo held well on one polyester webbing but starts lifting on a new polyester webbing, don’t immediately conclude that the printing is bad or that polyester is unsuitable for silicone. First look at what changed. The new webbing may have a different finish, treatment, or surface condition. Silicone formulations also differ: commercial textile silicone systems are available with strong adhesion to polyester and nylon, which is why fibre type alone cannot predict the result.
For your project, the most useful comparison is therefore finished webbing against finished webbing, not just polyester against polyester. Ask whether your production webbing has a surface treatment or finish that differs from the successful reference, and test the silicone on the exact webbing you intend to order.
If that surface treatment provides something your product needs, don’t remove it just to make the logo easier to apply. Ask your supplier to evaluate the silicone and printing process on the required finished webbing first. If suitable printing adjustments still cannot achieve the adhesion you need, then you have a clearer decision: change the webbing surface specification where possible, or keep the required webbing and consider another logo method.
Send us your webbing and logo requirements. We’ll check the combination before you change an approved webbing specification.
Your silicone logo design can affect durability because different designs can require different silicone print constructions, and that printed result still needs to tolerate how your webbing moves in use. Fine details, raised effects, and heavier silicone coverage should therefore not be treated as the same printing requirement.
For example, your logo may include small lettering that needs sharp definition, while another design calls for a thicker, raised silicone effect. Those two results can require different screen and ink-deposit choices. Silicone printing guidance shows this trade-off clearly: higher mesh counts can produce finer detail and a lighter deposit, while lower mesh counts can increase ink deposit and may improve stretch and durability. This means there is no useful rule that simply says “thinner silicone is better” or “a smaller logo is safer” on stiff webbing.
Instead, look at what your approved logo actually requires. If you need fine lettering, a raised effect, or substantial silicone coverage, give your supplier the actual artwork together with the webbing and required logo appearance. Don’t reduce the logo size or silicone thickness simply because the webbing feels stiff.
If the printed area will also bend in your finished product, include that movement when evaluating the sample. First confirm whether your required logo construction works with the actual webbing and movement; only adjust the design when the sample shows a real durability problem.
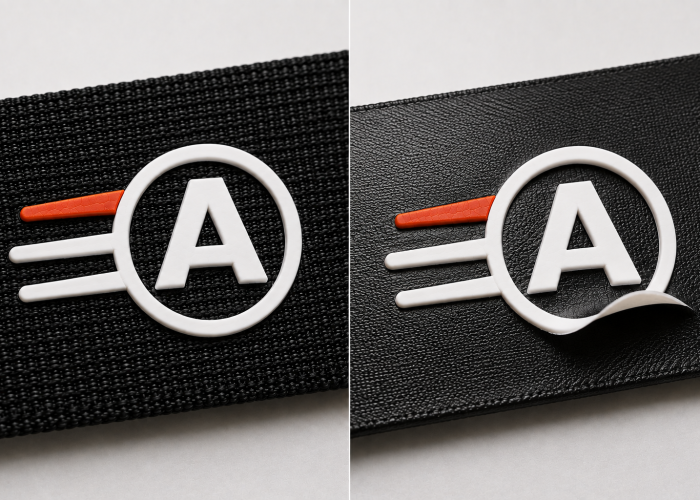
Yes. Silicone logo placement can affect durability when one part of your webbing bends, folds, or contacts hardware more often than another. The important question is not only where your logo looks best, but what that exact location has to tolerate after the webbing becomes part of your finished product.
Suppose your strap passes through an adjuster. One section may remain relatively flat, while another repeatedly curves as the strap is tightened and loosened. If your silicone logo sits on the flatter section, it experiences a different use condition from the same logo crossing that moving area. This does not mean a silicone logo will automatically fail near a bend—silicone textile inks can have very high elongation—but the movement at that location still needs to be included in your durability evaluation.
This is why the logo position on your artwork tells you where it will be printed; the assembled strap tells you what that position must survive. A placement that looks fine on a flat webbing sample can become a repeated bend or hardware-contact area after assembly.
Before approving the position, mark your proposed logo location on the webbing and assemble the strap with its actual hardware. Operate the adjustment or bending movement it will experience in use. If the logo crosses a repeatedly moving area, check whether shifting it slightly can avoid that condition without hurting your intended appearance. Sometimes changing the logo location is enough to keep both your required webbing and your original logo design unchanged.
We’ll help you check whether changing the webbing is justified or whether the printing side should be investigated first.
When a silicone logo fails, first check whether the problem follows the webbing or remains when the webbing changes. This comparison helps identify whether the webbing compatibility deserves closer attention or whether the manufacturer should investigate the silicone printing process first.
For example, if your silicone logo peels from the production webbing but the same silicone and printing conditions achieve good adhesion on a suitable reference webbing, the difference in webbing surface becomes an important clue. It does not automatically mean your webbing is defective or unsuitable for silicone. If the same failure continues across different suitable webbings while the printing conditions remain unchanged, the common printing variables become a stronger direction for the manufacturer to investigate.
This is why changing several variables and getting a good second sample does not tell you what actually solved the problem. If your supplier changes the webbing, silicone, and printing conditions together, you still don’t know whether your original webbing really needed to change. That matters when its stiffness, surface, material, or another specification was selected for a reason.
As the buyer, you don’t need to diagnose the printing process yourself. If your supplier says the webbing needs changing, ask what comparison supports that conclusion. If their testing shows that acceptable adhesion can be achieved on your original webbing after the printing approach is adjusted, ask them to resample on that webbing before you agree to a specification change. Only consider changing an approved webbing requirement when the testing shows that it is genuinely part of the compatibility problem.
Yes. If your webbing and logo requirements are suitable for silicone printing, your manufacturer may be able to improve logo durability by adjusting the silicone system or printing process before asking you to change the product. The right adjustment should depend on what actually went wrong in your sample.
For example, a silicone logo that starts lifting from the webbing does not present the same problem as one that remains well bonded but performs poorly after repeated movement. Your manufacturer should investigate the variables related to the observed failure rather than simply applying more silicone or changing several specifications at once. Silicone textile-printing systems have specific requirements for material selection, preparation, ink deposit, and curing, and these variables can affect the properties of the finished print.
As the buyer, you do not need to decide which printing parameter should change. What matters is whether your manufacturer can solve the problem while keeping the product requirements you want to protect unchanged. If your webbing construction, logo design, and placement are already approved, those provide a useful baseline for the next sample.
If your first sample fails, ask whether the printing process has been evaluated before agreeing to change your webbing or logo. Then ask for the revised sample on the same webbing, with the same logo and placement. If it now meets your durability requirement, the printing adjustment has solved the problem without compromising your product. If repeated adjustments still cannot achieve the required result, you then have evidence to consider changing another specification rather than changing it simply because the first sample failed.
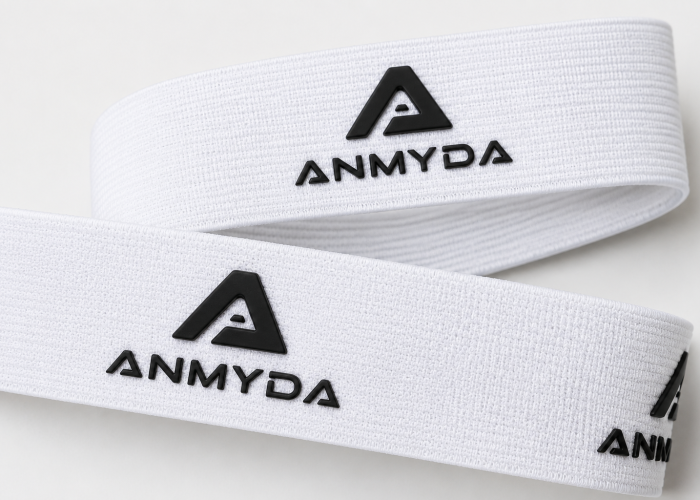
Test your silicone logo on the actual production webbing and reproduce the movement or contact that the printed area will experience in your finished product. A sample that looks good while lying flat confirms the appearance, but it does not by itself confirm the durability your application needs.
For example, if your silicone logo sits on a section that repeatedly bends as the strap passes through an adjuster, that bending should be part of your evaluation. If the logo area stretches in use, test it at the relevant working stretch. If it repeatedly contacts hardware or another surface, that contact creates a different wear condition to evaluate. The right test therefore comes from what happens at your actual logo location, not from applying the same bending or stretching test to every webbing.
This is also why a universal number such as 100 or 1,000 bending cycles cannot tell every buyer whether a silicone logo is durable enough. Test severity and acceptance criteria should reflect your application and expected use rather than an arbitrary cycle count.
Before production, tell your supplier how the logo area will move in the finished product, and provide an assembled sample or the relevant hardware when it materially changes that movement. Then agree on what result you need to see after testing. Approve the silicone logo based on the condition it needs to survive—not only how it looks when the sample arrives.
Before bulk production, let’s check whether your sample has been tested for the movement the logo will actually experience.
Silicone is not the right logo method when it still cannot meet your required adhesion or durability after practical printing, logo, and placement adjustments have been evaluated. This becomes especially important when making silicone work would require changing another specification that contributes more value to your finished product.
If your first sample fails, start with the lowest-impact change. First see whether the manufacturer can improve the result through the silicone system or printing process while keeping your product unchanged. If that is not enough, check whether a small logo-design or placement adjustment can solve the problem without materially changing your branding. Only then should you consider changing the webbing itself—and only if the webbing requirement creating the conflict is actually adjustable.
For example, if a particular webbing surface is essential to your product’s performance, replacing it just to keep a silicone logo may solve a branding problem by creating a product problem. But if that surface was only an aesthetic preference and an alternative webbing meets every important requirement, changing the webbing may be the lower-compromise decision.
If none of those practical adjustments can give you the required result, compare another logo method against the specific requirement silicone could not meet. If adhesion is the problem, focus on how the alternative works with your required webbing surface. If repeated deformation is the problem, evaluate how the alternative behaves at that location. Protect the higher-priority product or branding requirement, and change the requirement that creates the smaller compromise.
Thick or stiff webbing does not automatically rule out a silicone logo. What matters is whether the silicone can bond to your finished webbing and remain durable under the movement your actual logo location experiences.
Before changing an approved specification, identify what is creating the problem and test the lowest-impact adjustment first. If you’re unsure whether silicone suits your webbing, send us your webbing, logo, and application requirements. We can help you evaluate the combination before production.
We will contact you within 1 working day, please pay attention to the email with the suffix “@anmyda.com”.